Showing posts with label Battle Reports. Show all posts

Wednesday, February 2, 2011

Encounter at Ravelsbach, Part One

A Napoleonic Volley & Bayonet Battle in 1/900 Scale.

In order to try out my new battleboards, I decided to put together a small (+/- 3000 points per side) battle using the new second edition of the Volley & Bayonet rules.

My 2mm armies are not completely formated for V&B 2nd Ed. yet, but I have a lot of them and, with a bit of hedging, I can use them with the new rules.

This battle was a "roll your own" affair using the campaign system represented in the book. It takes place somewhere in northern Austria in 1813. Napoleon at the head of two infantry and one cavalry corps and backed up by a division of Middle Guards runs smack into two Austrian infantry corps and assorted support units.

The two armies are pictured below. Note that in my V&B set-up, I don't use divisional commanders as these are faily useless , in my oppinion, and just clutter up the table. Seeing as how they are simply a marker notating a division's center of gravity and can be placed wherever a player likes, every turn, I simply point to a spot and say "the commander's here", drawing command from that point.

The French Army


II Corps, Victor
5 4-5 Infantry brigades, 1 2-5 Light Cavalry Brigade, 3 2-5 Artillery battalions
All infantry brigades have an extra skirmisher attached (so they are effectively 5-5), Basically, on legere regiment was broken down in each corp to give all the non-legere regiments a skirmisher.

III Corps, Souham3 4-5 Infantry brigades, 2 4-4 Infantry brigades, 1 2-5 Light Cavalry Brigade, 3 2-5 Artillery battalions
All infantry brigades have an extra skirmisher attached and all infantry are poorly trained. The two 4-4 brigades have no elites (they are effectively 5-4 with their attached skirmishers).

I Cavalry Corps, Latour-Mauborg
2 2-5 Dragoon Brigades, 1 3-5 Light Cavalry Brigade, 1 1-6 Horse Artillery Battery.
 
Reserve, Napoleon
2 5-7 Guards Brigades, 1 2-7 Artillery Battalion.
The Guards brigaes have inherent infantry skirmishers. Napoleon, of course, is also the army commander and a monarch (which means some special rules apply to him).


The Austrian Army


I Corps, Colloredo
8 6-4 Infantry Regiments, 1 3-4 Grenz Regiment, 1 3-5 Light Cavalry Brigade, 1 1-6 Horse Artillery battery, 1 3-6 Field Artillery Brigade.
All Infantry and Grenz Regiments have brigade guns and no elites. The Grenz regiment can break down and skirmish, but since I have no skirmish stands done for the Austrians yet, they're pretty much SOL.

II Corps, Meerveldt
8 6-4 Infantry Regiments, 1 3-4 Grenz Regiment, 1 2-5 Light Cavalry Brigade, 1 1-6 Horse Artillery battery, 1 3-6 Field Artillery Brigade.
All Infantry and Grenz Regiments have brigade guns and no elites. The Grenz regiment can break down and skirmish.

Reserve Corps, Nostitz
3 2-6 Heavy Cavalry Brigades, 1 1-6 Horse Artillery Battery, 2 3-4 Grenz Regiments, 1 2-5 Light Cavalry Brigade.
All Grenz Regiments have brigade guns and no elites.


         The battlefield, divided into set-up areas.

The French line of communications leads off of the road in the upper right corner of the map. Austrian communications lead off board from the road in the lower left corner. Note that neither player has seen the map before organizing their armies into three sections and a reserve,. They thus cannot optimize their wings according to the terrain.

The French Army is organized as follows:

Right Wing
2 4-4 brigades, 1 4-5 brigade, 2 artillery. Souham.

Left Wing
3 4-5 brigades, 2 artillery and all cavalry from II and III Corps. Victor.

Center
2 4-5 brigades, 1 artillery from III Corps. 2 4-5 brigades, 1 artillery from II Corps. 1 Light Cavalry Brigade from I Cavalry Corps. Latour-Mauborg.

Reserve
2 Guards brigades, 1 Guards artillery, 2 Dragoon brigades, 1 Horse artillery battalion. Napoleon.

The Austrian army is organized as follows:


Right Wing
4 Infantry regiments, 1 grenz regiment, 1 horse artillery, 1 light cavalry brigade from I Corps. Coloredo.

Left Wing
4 Infantry regiments, 1 grenz regiment, 1 horse artillery, 1 light cavalry brigade from I Corps.
Meerveldt.

Center
4 Infantry regiments, 1 artillery battalion from I corps; 4 Infantry regiments, 1 artillery battalion from I corps.


Reserve
The Reserve Corps. Meerveldt.

Tuesday, June 29, 2010

Dave's Sunday Drive


In order to better test my new Massive units rules, I put together a wee battle on Sunday evening.

Dave has been tasked with clearing a desert road into the enemy's flank. The road is bisected by a low ridge line with some light cover and is held by a company of House Penn-Taylor main battle tanks. Dave has CV 10 from his off-board CO and the PT boys have a CV 9 on-board CO.

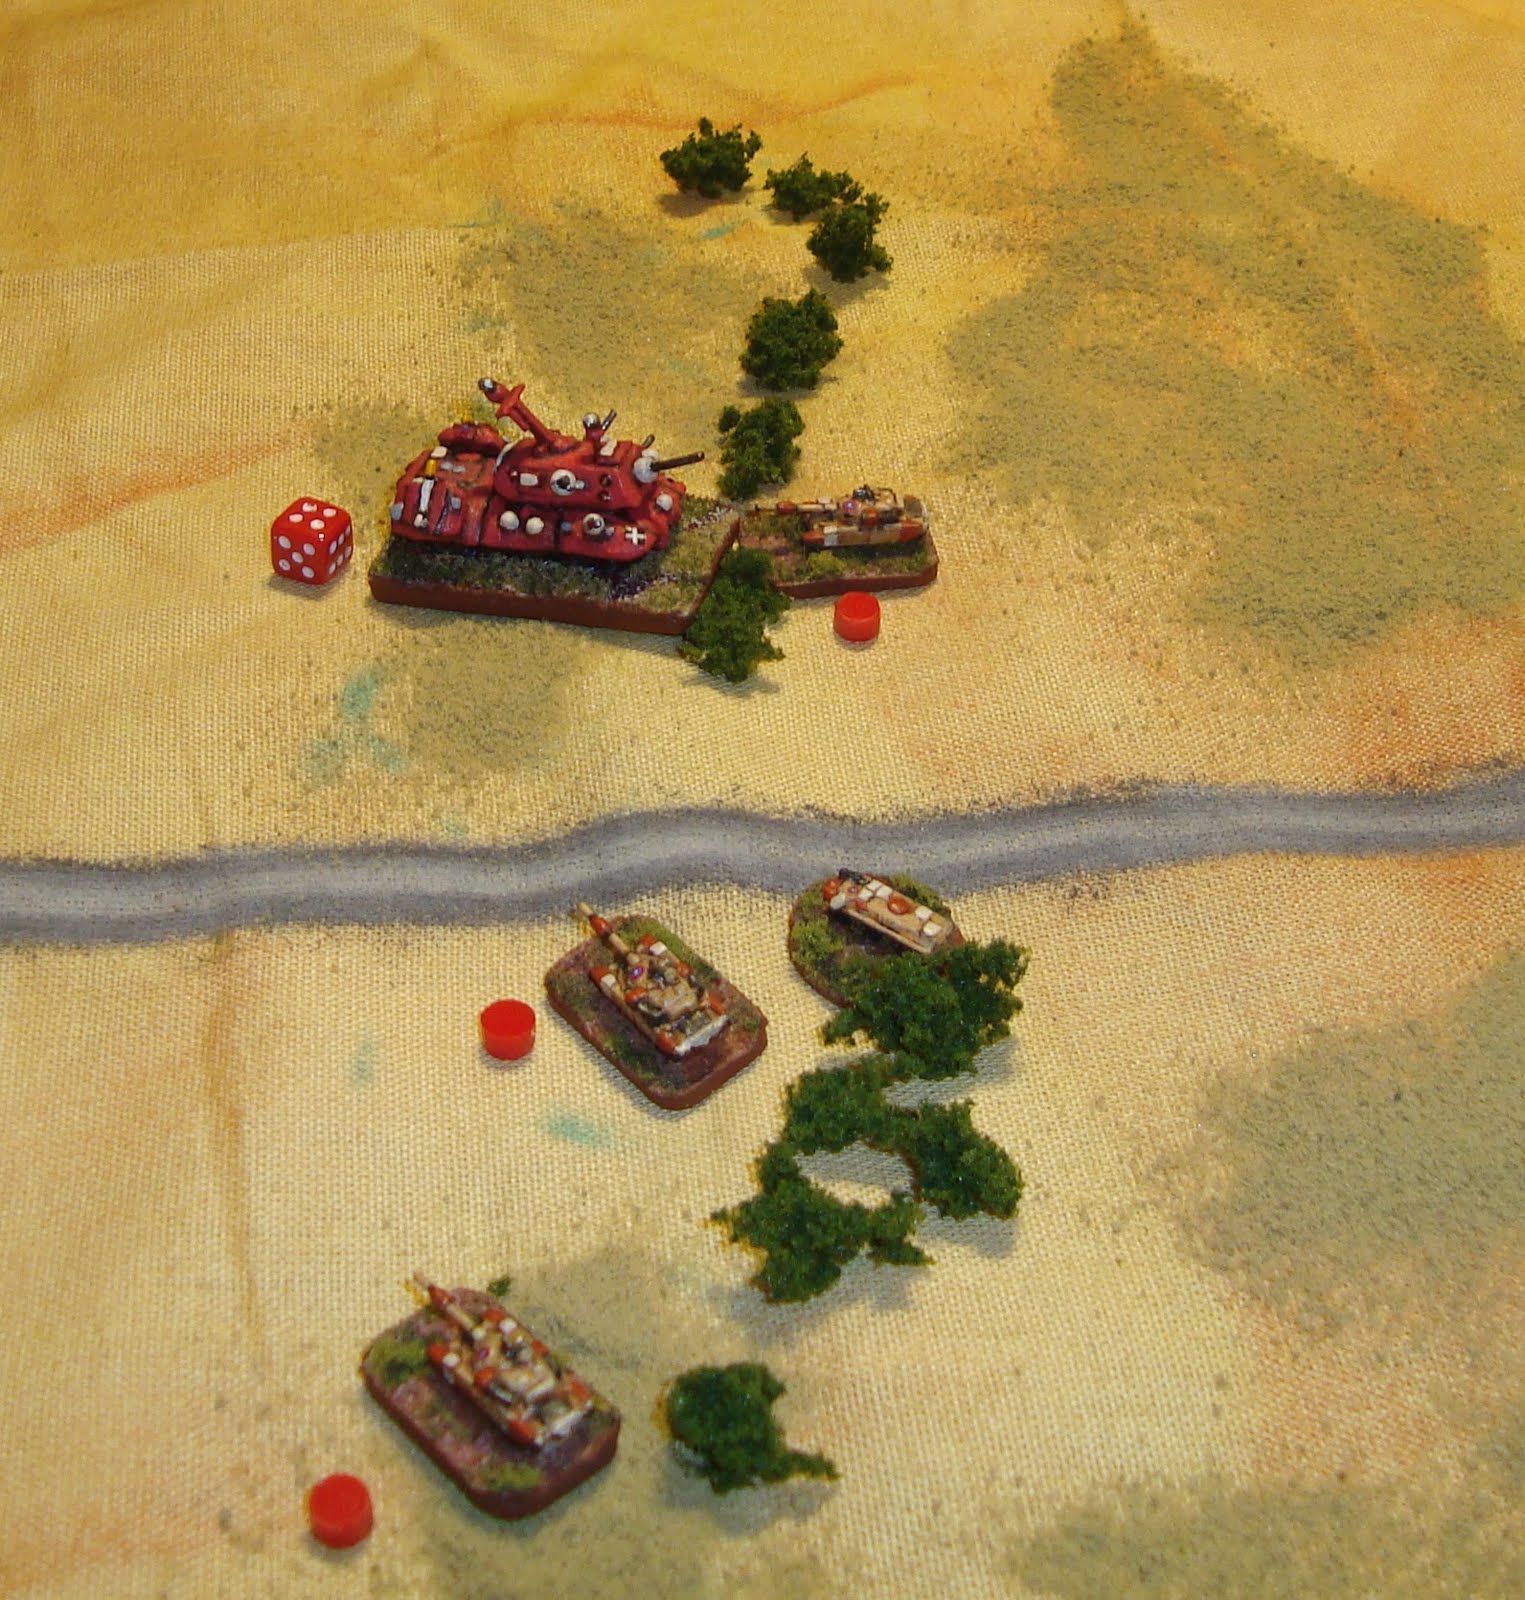
The Penn-Taylor company on the ridge. Note that the CO is within convenient command range of only two of the platoons.


Turns 1 and 2. Dave begins an oblique advance on the north end of the Penn-Taylor line. The southernmost platoons open fire and leave a nasty scratch on Dave's paintwork.


Turns 3-6. Dave closes the distance on the northernmost platoon and opens fire, doing sweet fuck-all. He launches his missile at the middle PT tank and catches the HQ in the burst, again, doing no discernable damage (Dave is preoccupied with an upcoming coumn deadline and a good part of his main processing unit is editing instead of aiming). On turn 5, the PT CO blows his command roll. The blunder sends the southern tank platoons charging straight towards Dave - a blunder which turned out to be sort of providential, actually, because it cut their range down to half.

(These accidental charges/retreats which turn out for the best are beginning to get to be a habit with the PT boys. See their last battle report here.)

The PT tanks change tactics to firing to damage and manage to whittle Dave down to two damage points. A critical hit also tanks out his secondary battery, leaving him with only his main gun. Dave manages to suppress the northenmost tank a couple of times, but that's about it.


Dave finally wakes up to the fact that there's a serious problem here and sets aside his editing work. Taking full stock of the situation, he decides that a full-fledged charge is in order and goes straight in on the northernmost tank. (Being that he has 9 assault dice and an additional die for charging versus the MBT's 3, this is not a bad idea).

Dave weathers the closing fire well enough but skunks out completely in the following assault: only two unsaved hits out of ten dice! He suppresses the tank, but that's it.

Meanwhile, cognizant of the fact that Dave's now down to only two hits, the Penn-Taylor commander urges his crews to fire for effect. All four of their shots hit and two make it through Dave's armor, finally bringing the nig cybertank to a halt on turn 8, the last turn of the game.

Luckily for Dave, a Möder-Fokker battalion is coming up the road behind him and will probably have their support echelon salvage his brain box. If the upcoming battle against House Penn-Taylor is won, Dave's chasis will also probably be towed back to the Fokkin Castle for refurbishment. Dave may be old, but he's tough and waste not, want not.
Dave waits for a tow.

The battle showed me that the system works fine, but needs a few tweaks yet. Principal among these si that I've decided that "fire to damage" hits will also carry over throughout the turn. Other than that, though, the game went well. Dave really stunk on his rolls and, to be fair, the odds were against him from the outset, what with having to chrage an equivalent force in a prepared position.

It was a fun little game for a half hour!


Wednesday, November 4, 2009

Hellzapoppin' Valley: A Future War Commander Battle

This was my first time playing Future War Commander and, unfortunately, the battle report is only partial as I lost some of my archives in our recent move. Basically, this was the first battle in an on-going campaign between the forces of the Red Baron Sacha Möder-Fokker and the Arcadian Socialist Syndicates  / Human Liberation Soviet (otherwise known as the ASS/HLS)

In any case, it shows about half of the game which was played out with 3mm (1:600) scale sci-fi figures from various manufacturers.

Enjoy!


Turn One


The Arcadians win both the initiative and the air superiority roll. They also achieve notably good luck on their deployment rolls. The mech regiment’s light squadron manages four successful command rolls and moves onto the board from the south edge in double time. Half of the light mechs occupy the agricultural station in the center of the board and take up covering positions around the crossroads, while the other half of the squadron, including the regiment’s recon element, occupies the ridgeline to the southwest. With the light squadron covering their advance, the heavy squadron follows up. Meanwhile, the Arcadians' massive walker moves to the highest point of the southeast ridge and takes refuge in the woods there, overlooking the battlefield. Finally, the Arcadian armored battalion pours in down the valley road from the east, led by their light dragoon squadron. The heavy dragoon squadron, backed by two tank troops peels off north and heads for the village in the NE quadrant of the board.

The Baron’s forces, by contrast, get off to a slow start. None of the armored regiment’s vehicles make it onto the map while the mech regiment only gets one successful command roll. They deploy from the west end of the valley, line companies leading and support company following. The light company scouts to the north of the road. Their massive walker manages to deploy onto the plateau overlooking the valley, but blows its subsequent command roll.

No firing occurs on turn one.


Turn Two


The Arcadians’ lucky streak soon comes to an end, however. Turn two begins ominously, with the recon units missing a communications roll to call in air and artillery support on the massed mechs in the valley below. A command bonus allows the heavy dragoon squadron to occupy the northeastern village and dismount its troops, however, while the unit’s attached armored support takes up a camouflaged covering position along the wooded ridgeline to the south. This effectively blocks the road to the eastern exit area, as well as securing the village, gaining two quick victory points for the ASS/HLS. Meanwhile, the light dragoon squadron enters the experimental station’s grounds and unloads its infantry while the rest of the battalion’s armor continues on up the road towards the complex. Unfortunately, in the south both the mech regiment’s HQ and the Arcadian CO blow their command rolls, leaving everyone high and dry. This is particularly devastating for the massive walker, which was counting on getting in the first strike against its counterpart on the other side of the valley.

By contrast, the Baron’s luck is as good as the Arcadians is bad. The Mech regiment wins TWO back-to-back command bonuses. They charge up the southwest ridge and unload a storm of poorly aimed autocannon fire into the Arcadian light mechs along the ridgeline. Quantity makes up for quality, however, and both the Arcadian recon troop and a light mech troop disintegrate in the hail of shells. The massive walker fires at its Arcadian counterpart and manages to knock its shields down by 50%¨. Meanwhile, the Baron’s tardy armored regiment finally puts in an appearance and comes barreling down through the northern pass in full combat order.
 
 
The Baron’s Guards storm the ridge while the Arcadian
 heavy squadron is paralyzed by command indecision.


The Baron’s militia armor regiment finally make it onto the board
 and deploy down the northern valley. Meanwhile, the mech
regiment’s light company scouts out the crossroads.
 
Turn Three


The Arcadian armor battalion moves into position to ambush the stike coming through the pass. Meanwhile, the light squadron mechs in the agricultural station open up on the Baron’s lead tanks. Disaster strikes once again, however, as the mech regiment commander misses his second consecutive command roll, leaving the light squadron without orders. The CO steps in and calls down a heavy artillery strike on the north pass. This destroys three tank platoons and disrupts another, together with the armored battalion’s commander.

The CO then orders the heavy squadron over the ridge in a charge on the Baron’s Guards. They are met by massed autcannon fire and half of them are disrupted. Luckily (!) however, the Arcadian CO bumbles his last roll and the command blunder table orders a retreat towards the board edge, which puts the heavy squadron behind the ridgeline once again. Unfortunately, the blunder also pulls the light squadron’s surviving mechs out of the woodsline, but still, I’d have to say the blunder worked in the Arcadians’ favor!

Luck does not smile on the Baronial forces, either. In the north valley, the only operative HQ manages to make one command roll, moving the recon company and part of the tank battalion into the treeline across from the ag station. The mech regiment commander misses his command roll and the CO directs an artillery strike onto the Arcadian’s massive walker, followed by two volleys from the support company and the Baronial massive walker. All this massive concentration of fire (40 smart missiles) manages to do is knock down the enemy walker’s shields and disrupt it, however.

Needless to say, there is very little movement this turn.
 
That's it for now! I promise the next report will be better.