Tuesday, February 8, 2011

Basing Suggestions for O8's 3mm ACW Figures

The excellent "Steel on Sand" blog has beat me to reviewing O8's beautiful  3mm American Civil War figures. I'm still awaiting my order in Rio de Janeiro, but you can see them laid out in comparison to other microscale figures over there.

The one problem with these figs, as the SoS review points out, is that the command stand has its flags offset from the center. This isn't an issue if you base your figs on 40mm or 60mm wide bases, but if you, like me, base microscale on 20-30mm wide bases, having the flags removed from the center of the line might irritate your anal retentiveness.

To complicate things, O8 uses an aluminum-based alloy which is incredibly strong, but brittle, making it very hard to cut. Also, the infantry bases are not "pre-grooved", which would allow one to snap them into component figures with ease. I thus plan on using a Dremel tool with a cutting wheel to chop mine up. Still, no sense in making more cuts than one needs, neh?

With that in mind, I offer the following basing schemes for O8's ACW figures:


Note that by cutting the strips up, one can easily change the mix of headgear in the regiment, giving the Union more kepis and fewer hats and the Confederates the opposite. Personally, I think I'm going to go with the last option. I've displayed it here showing only the Good Guys, but obviously a Slaveocrat regiment can also be done up in this fashion. The advantage of this way of doing things is that it allows one to play at the tactical scale (150 men per stand) and move the commander and standards about as the number of units in the regiment increases or decreases. Additionally, it saves on skirmishers, who are now properly detatched from the main line and don't need to be represented twice. Also, with a 3x3 centimeter sabot, one can set up a brigade, as shown, and handily play Volley & Bayonet or other army-level systems.

One final basing idea, not shown above, gets rid of another small problem with the O8 figs at the cost of a lot of extra work. ACW units marched at 24 inches per file, but O8 has the troops at about 30 inches per file. If one were to seperately cut out every figure, one could probably get a historically correct spacing (with the cut taking out the excess metal) and could place 15 files on a 30cm wide base. With a Dremel, such cutting won't be a problem. The real chore would be hiding all the jagged edges and gaps when flocking.

I'm probably going to try one or two regiments like this (as well as another couple of regiments using skirmish figures) just to see how it looks, but it seems like too much work for it to be worth doing it for all the units.

Wednesday, February 2, 2011

Encounter at Ravelsbach, Part Two

A Napoleonic Volley & Bayonet Battle in 1/900 Scale, part 2.

Napoleon pulls cards #3 and #13 as his deployment options.


Advance Guard would allow Napoleon to concentrate his forces on the left flank while conducting a holding action in the congested right flank. However, Card #13 allows this manuever with more security, given that the French right wing consists solely of poorly trained infantry, which would find it difficult to manuever in the woods and villages of the right flank.

Napoleon thus chooses Card #3, Advance Guard, Echelon Right. He will set up all his units on the board, but remove the right wing at the end of turn 1 and bring it in on the left wing on turn 4.

Ironically, the Austrians pull cards #22 and #23, which are both Turning Maneuver, Right. #22is marginally better, so that gets chosen. The Austrians deploy everything on the table and will remove the reserve and bring it in on right edge of the table (the French left flank) on turn 3. The Austrians figure that this will allow the French to either advance into a trap or have their defensive line quickly rolled up by an unexpected cavalry charge.

Here are the deployments, then:


Napoleon is betting all his chips on a concerted push up the left flank, crushing the Austrian right and rolling up the battleline from there. A couple of III Corps brigade will attempt to hold out as long as possible in the villages and forests of the right flank while Le Grande Armeé wins it for the team on the right.

By contrast, the Austrians will drive up through the middle and try to break the French middle. This will be aided by a surprise strike from the right on turn 3. With the deployment complete, the Austrian is happy he chose Deployment card #22 and not #23, which would have called for the reserve to be committed on turn 3. The Austrian player feels that three turns will be more than enough for the French to get well stuck in before the surprise blow falls.

Encounter at Ravelsbach, Part One

A Napoleonic Volley & Bayonet Battle in 1/900 Scale.

In order to try out my new battleboards, I decided to put together a small (+/- 3000 points per side) battle using the new second edition of the Volley & Bayonet rules.

My 2mm armies are not completely formated for V&B 2nd Ed. yet, but I have a lot of them and, with a bit of hedging, I can use them with the new rules.

This battle was a "roll your own" affair using the campaign system represented in the book. It takes place somewhere in northern Austria in 1813. Napoleon at the head of two infantry and one cavalry corps and backed up by a division of Middle Guards runs smack into two Austrian infantry corps and assorted support units.

The two armies are pictured below. Note that in my V&B set-up, I don't use divisional commanders as these are faily useless , in my oppinion, and just clutter up the table. Seeing as how they are simply a marker notating a division's center of gravity and can be placed wherever a player likes, every turn, I simply point to a spot and say "the commander's here", drawing command from that point.

The French Army


II Corps, Victor
5 4-5 Infantry brigades, 1 2-5 Light Cavalry Brigade, 3 2-5 Artillery battalions
All infantry brigades have an extra skirmisher attached (so they are effectively 5-5), Basically, on legere regiment was broken down in each corp to give all the non-legere regiments a skirmisher.

III Corps, Souham3 4-5 Infantry brigades, 2 4-4 Infantry brigades, 1 2-5 Light Cavalry Brigade, 3 2-5 Artillery battalions
All infantry brigades have an extra skirmisher attached and all infantry are poorly trained. The two 4-4 brigades have no elites (they are effectively 5-4 with their attached skirmishers).

I Cavalry Corps, Latour-Mauborg
2 2-5 Dragoon Brigades, 1 3-5 Light Cavalry Brigade, 1 1-6 Horse Artillery Battery.
 
Reserve, Napoleon
2 5-7 Guards Brigades, 1 2-7 Artillery Battalion.
The Guards brigaes have inherent infantry skirmishers. Napoleon, of course, is also the army commander and a monarch (which means some special rules apply to him).


The Austrian Army


I Corps, Colloredo
8 6-4 Infantry Regiments, 1 3-4 Grenz Regiment, 1 3-5 Light Cavalry Brigade, 1 1-6 Horse Artillery battery, 1 3-6 Field Artillery Brigade.
All Infantry and Grenz Regiments have brigade guns and no elites. The Grenz regiment can break down and skirmish, but since I have no skirmish stands done for the Austrians yet, they're pretty much SOL.

II Corps, Meerveldt
8 6-4 Infantry Regiments, 1 3-4 Grenz Regiment, 1 2-5 Light Cavalry Brigade, 1 1-6 Horse Artillery battery, 1 3-6 Field Artillery Brigade.
All Infantry and Grenz Regiments have brigade guns and no elites. The Grenz regiment can break down and skirmish.

Reserve Corps, Nostitz
3 2-6 Heavy Cavalry Brigades, 1 1-6 Horse Artillery Battery, 2 3-4 Grenz Regiments, 1 2-5 Light Cavalry Brigade.
All Grenz Regiments have brigade guns and no elites.


         The battlefield, divided into set-up areas.

The French line of communications leads off of the road in the upper right corner of the map. Austrian communications lead off board from the road in the lower left corner. Note that neither player has seen the map before organizing their armies into three sections and a reserve,. They thus cannot optimize their wings according to the terrain.

The French Army is organized as follows:

Right Wing
2 4-4 brigades, 1 4-5 brigade, 2 artillery. Souham.

Left Wing
3 4-5 brigades, 2 artillery and all cavalry from II and III Corps. Victor.

Center
2 4-5 brigades, 1 artillery from III Corps. 2 4-5 brigades, 1 artillery from II Corps. 1 Light Cavalry Brigade from I Cavalry Corps. Latour-Mauborg.

Reserve
2 Guards brigades, 1 Guards artillery, 2 Dragoon brigades, 1 Horse artillery battalion. Napoleon.

The Austrian army is organized as follows:


Right Wing
4 Infantry regiments, 1 grenz regiment, 1 horse artillery, 1 light cavalry brigade from I Corps. Coloredo.

Left Wing
4 Infantry regiments, 1 grenz regiment, 1 horse artillery, 1 light cavalry brigade from I Corps.
Meerveldt.

Center
4 Infantry regiments, 1 artillery battalion from I corps; 4 Infantry regiments, 1 artillery battalion from I corps.


Reserve
The Reserve Corps. Meerveldt.

Tuesday, January 25, 2011

30cm x 30cm Terrain Modules


Inspired by Ana Paula's Christmas gift of a bunch of Microform 1/1200 scale buildings (which I've detailed here) and Depot de la Guerre's handcrafted terrain modules (reviewed here), I've decided to build my own terrain modules for my 1/600 and 1/900 (3 and 2mm) miniatures.

The ground scale in these things is nominally 1:10000 (or 1 centimeter equals 100 meters), which makes them useful for my 2mm centimeter scale Volley and Bayonet set up and my WWII company-level figs. However, they can also be easily scaled to 1:4000 (1 cm = 40 meters), which is what I play platoon-scale Cold War Commander at, most particularly my 3mm Blitzkrieg imagi-nation armies of Azurnerreich and Krasnynorad.

This was my first shot at producing "serious" modules, although you can see some earlier efforts for 2mm stuff on the 2mm Yahoo group (note that you must be a member to see them). This time, I made a concerted effort to keep everything in scale. I went for 1/1200 because it's been my experience that "scaling down" terrain a notch or two from the figure scale that will be used on it makes for a better-looking miniatures experience, especially in large battles (which, let's face it, is the main reason to game in 2 or 3mm).

I'll do a terrain tutorial later, if there's interest, but just give a basic rundown of what I did here.

First of all, I went to an art supply store and bought some 30cm x 30cm artists' paint boards. These come in two varieties in Brazil: chipboard and linoleum covered chipboard. Like an idiot, I bought the regular chipboard because, at 3 R$ (2USD) a shot they were half the price of the linoleum-covered ones. Obviously, if I'd gone the other route, I'd have much more warp-resistant boards, so that's what I will buy in the future.

As you can see in the photo above, some of the boards warped. I've been able to reflatten most of them by painting a mixture of glue and water on the backside of the boards, suspending the boards upsidedown on four paint bottles at the corners and setting a weight in the middle of the back of the board. Better, though, to not have the warping problem at all, so linoleum it is next time.

I wanted to make a variety of terrain types on geomorphic modules. I decided that placing streams on the boards would make them too busy, so later I'll build a few specific river and stream modules to slot in with these. My first six boards were (going from the upper righthand corner clockwise):

1) A wooded and hedged agricultural area.
2) A town.
3) An open, undeveloped area.
4 and 5) Small villages with fields and some woods.
6) A large hill.

Three other modules are currently awaiting completion and are not shown here: another large hill and two rolling hills, one with agriculture and one largely undeveloped.

The only major problem I had was with the hill, which I made with paper maché over styrofoam. First, it took a week to dry. Secondly, it shrunk quite a bit as it dried, leaving cracks and exposing the edges of the styrofoam core. I fudged this by painting them as steep slopes and the ultimate result is pretty good, if I do say so myself.

I'm having better luck making the rolling hills, which are smaller. These, I lay out on a thick plastic cutting board and then I stick them in the microwave for 15 minutes. Voilá! Instant hills to be glued down on the boards. I then use a bit of extra paper maché to smooth out the seems. Works pretty good so far.

For the basic modules, I first paint them all over forest green. I then paint on the roads as dark brown. I plot out where I want woods (painted dark green), fields (pained tan and in varying shades of green) and buildings (painted brown). I then use a selection of Woodland Scenics static grasses to flock the fields, followed by green and yellow flocking for the open areas (sometimes touched up with a hint of bright green static grass and dark green flocking). When that's all thoroughly dry, I place down clumps of coarse foilage in medium and dark green for trees, sometimes literally spruced up with a few of PicoArmor's pine trees, here and there. Building lots are then given a dusting of dark green flock and the buildings (which I have pre-painted) are glued down to them. After that, I detail building hedges and small clumps of trees here and there, fruit groves... whatever I think will be fun. Finally, the roads are painted in, grey or light tan, as the case may be.

Simple enough.

That's a Jack Daniels bottle and my hand, for scale. Six terrain modules give me a three foot by two foot set up which corresponds to your average 6x4 foot board at larger scales. Many people often quip "Why play with 3mm figures? It's like playing with grains of rice!" First of all, O8's figs are much more detailed than grains of rice. But more importantly, 3mm allows me to place a beautiful, full-fledged miniatures set up on a coffee table and still have room left over for markers, rules and dice.


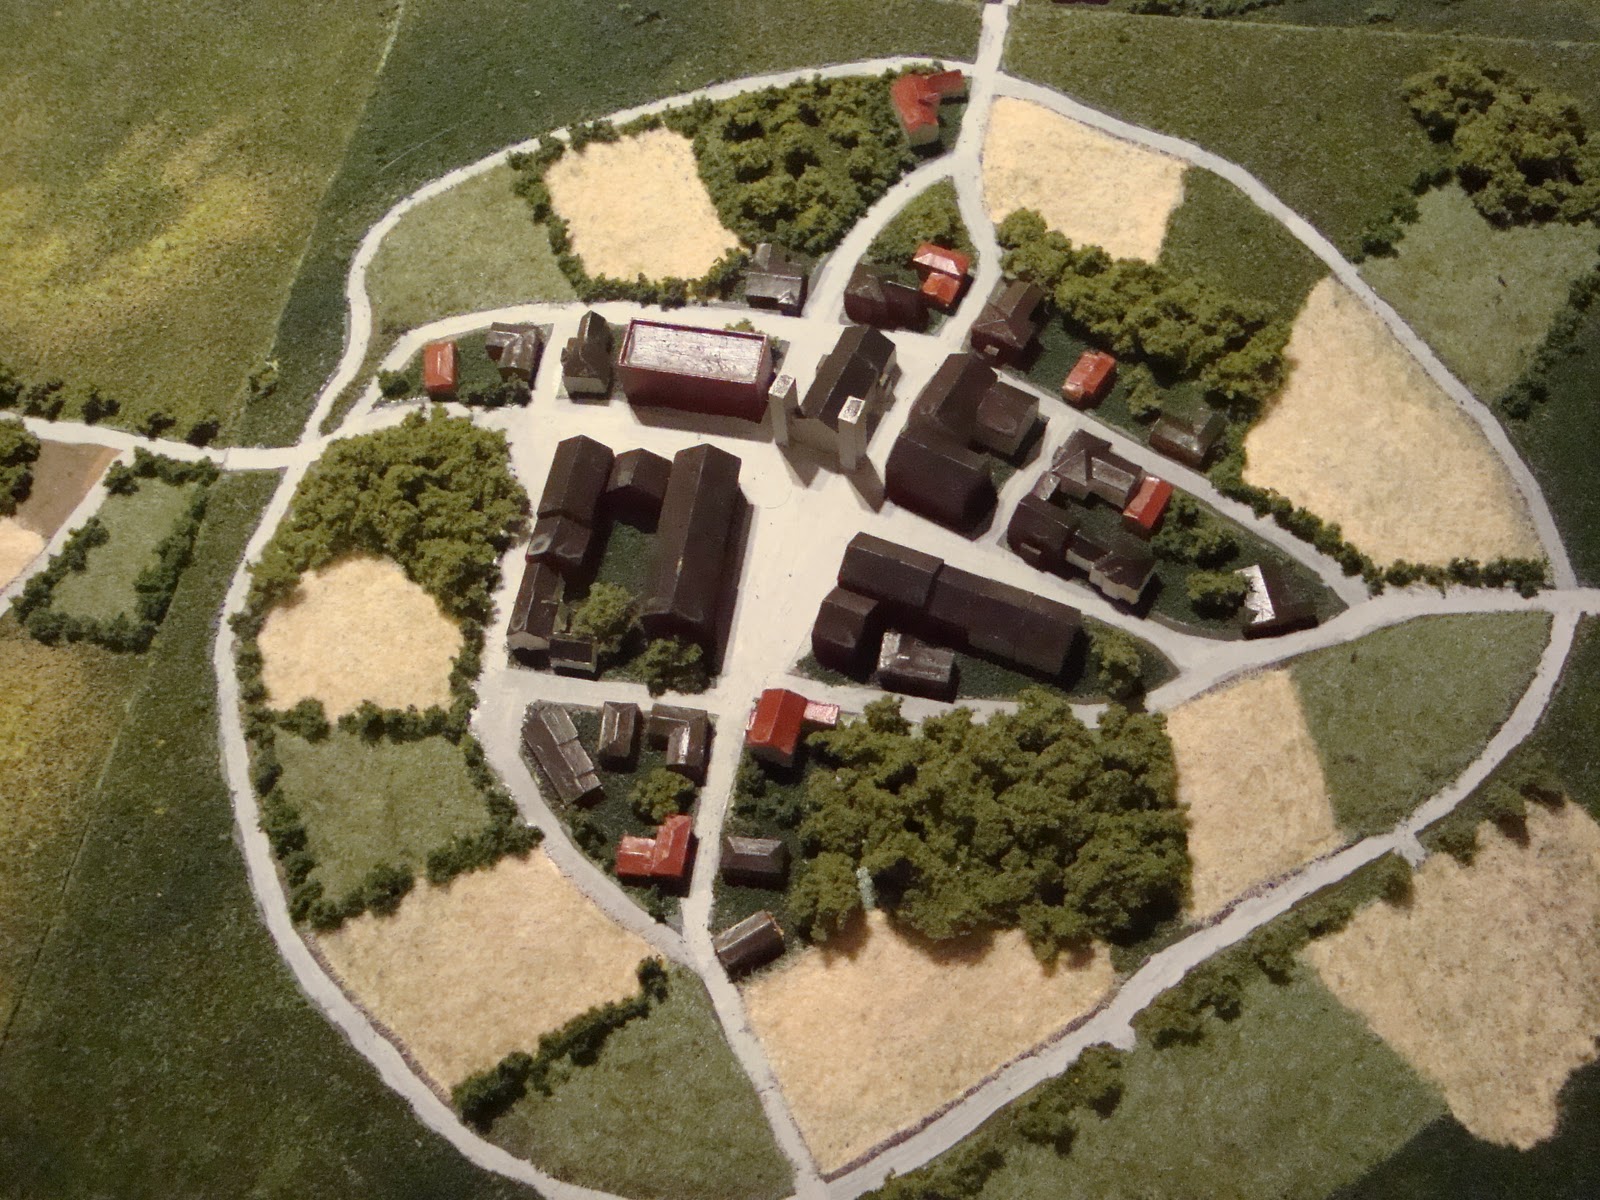
Lovely Picoburg. Note the kit-bashed cathedral, made from a Microform house and some plastic strips. I've decided to not overly detail the buildings as that could easily make the modules too busy and distract the eye away from thr miniatures. I've also tried to keep to a generic architectural style which could be used anywhere in Western Europe from the 18th to the 20th centuries. Here, there's only one building that kind of breaks that ruke and even then it doesn't do so ostentatiously. (There are a couple of ranch-style houses, too, but they can easily be glossed as lower-class dwellings).


Looking over the rooftops of Picoburg to the Picoberg on the horizon.


Hedgerows, small villages, woods and fields. A module with congested terrain.


So how do the figures look on the new terrain? Pretty good, actually. For years I've been holding off building terrain modules because I've wanted to go with the drop-cloth and pastels method, putting terrain down and drawing around it so that it can be picked up if units occupy it. I've not liked the "infantry-on-top-of-the-woods" method I'd probably have to adopt if I used modules. After seeing Depot de La Guerre's suff, however, I realized that this was not such a big deal if the modules were to be at 1:10,000 scale.

See for yourselves. Here are some pictures of a Krasnynorad tank regiment forming up to attack a Azurrnereich Mechanized taskforce...

Big Red's 31st Tank Regiment forms battle order out of march columns. Two tank battalions flank Picoville, occupied by a motor rifle battalion, while a third tank battalion waits in reserve behind the village. A regiment of 122mm artillery is deployed to the right of the reserves.


The Thin Blue Line. A reinforced combined arms team occupies the Picoberg and Pico Farms to the left while another team guards the approaches to Picoburg on the right.


The Blue right wing, up close.

Friday, January 7, 2011

New Year, New Terrain: Microform Buildings

...and a very Happy New Year to all you Lead Doesn't Bleed readers (all two dozen of you)!

I took a brief end-of-the-year sabatical in order to attend conferences and grade papers, so this will be the first post of the new year.

Lucky, lucky me: Da Wife bought me a passel of Microform 1/100 buildings for Christmas and they've arrived today!

As most readers of this blogknow, I generally play in 1/700 (or 3mm) scale, so I've wanted some appropriate buildings for quite some time now. Up to now, I've been using PicoArmor's monopoly buildings and these are fine, but they're also a bit too big for my tastes. Like many miniatures gamers, I prefer my terrain to be one scale step down from my figs.

Enter Microform Models, a company which specializes in castings for architects. Their 1/100 scale line is set to a model scale of 1/1200, which is perfect for 2 and 3mm figures (those of you who prefer more in-scale scenery will probably perfer Microform's 1/50 or 1/60 lines for 3mm).

Here are some pictures of the castings, set next to some O8 3mm WWII tanks and infantry and Picoarmor Monopoly buildings...


....and from another angle:


And finally, here's a close-up, which should give an idea as to how these things scale against 3mm figures:


What's really nice about these castings is that they'll still mesh with Picoarmor's Monopoly hotels, which now become 4 story tall townhouses.

Great stuff!

Friday, October 22, 2010

The Quarterly Report, V1. #1

Being a quadriannual report of all things Quarish in Rio de Janeiro


The 116th Provisional Brigade occupies a hilltop

15mm Quar Arrive in Rio
On my recent trip to the U.S. top take part in the Stop Trafficking! conference at DePauw University in Indiana, I took the opportunity to pick up a bunch of 15mm Quar from Zombie Smith.

The quar are a delightful ficticious race which has sprung from the ferbile immagination of Joshua Qualtieri, who has apparently been dreaming up these little buggers ever since he was a kid. They are a race of extremely pugnacious anteater-like omnivores which Josh has imagined as caught up in a never-ending cycle of clan-based politics and warfare. At the current point of the story line (i.e. the point the miniatures are modeled on), the quar have a technological base that's roughly on the level of World War I and the current round of the endless conflict (appropriately called The Long War) has lasted 700 years. A new messianical leader has arisen among the quar of the nation-state of Tok, however. Alykinder is part Napoleon Bonaparte, part Leon Trotsky and part Moe from the Three Stooges. He has held out the hope, to all quar kind, that the Long War may finally be ended through a widespread and thorough-going revolution which will overthrow the ruling clanlords and usher in an era of unprecedented peace and prosperity across Alwyd, the quar's planet.

Fired by missionary zeal, Alykinder's Crusader catrawds (regiments) have overrun most of their enemies, partly due to the fact that their leader is something of a genius for military innovation (he pioneered the use of dirigible and zepplin-based airmobile tactics, for example). Alykinder's dream of peace through war seems to be going terribly astray, however. The intensified violence brought about by the Crusade has broken the bounds of the laws which the quar have traditionally used to keep total war at bay. Now, the four cadierquar of the appocalypse roam the face of Alwyd and Crusade seems posed to toss all of quarkind into an age of bloody chaos never before seen in their history...

The quar miniatures produced by Zombie Smith come in two sizes: 15mm and 28mm. Being that the quar themselves are somewhat shorter than humans, this means a "foot to headtop" size of 12mm and 22mm. My first batch of quar are four company-sized packs of 15mm figs for a total of about 200 miniatures. Josh very nicely supplied me with some extra mounted officer figs so that I could have a go at building a cavalry regiment as well. Josh claims that he plans to have the entire 28mm line of quar figs reproduced in 15mm "very soon now", but at this point, all you can buy are Crusader infantry. This is not such a problem as one might think, however, because many of the factions opposing Alykninder's forces use Crusade-style equipment. You can purchase 15mm quar with helmets, caps and bear heads, so I've made the helmeted quar my Crusader forces and the rest will be their Royalist foes.

Zombie Smith produces two sets of rules for use with the quar and both may be bought and downloaded on-line. This Quar's War is meant to be used with the 28mm or 15mm stuff for company-sized conflicts (40-50 figures per side). Meanwhile Songs of Our Ancestors is a skirmish set, geared towards battles with 6-12 figures a side. Both systems are excellent and are worth your money even if you plan to use your own rules as they come with background information about the quar and their world. TQW is especially good in this sense and many reviewers have compared the book to Osprey's historical volumes. Particularly poignant in TQW is the series of letters which open each chapter between a Crusader recruit and his young cousin back home. Understated and well-written, they give glimpse into the pathos and futilty of the Quar's conflict and warfare in general. For this reason alone, TQW get's a big thumbs up from us here at Lead Doesn't Bleed. Josh Qualtieri, like many wargamer's, seems to be something of a pacifist and is on-record as saying that one of the reasons he developed the quar is so that gamers could indulge in bloody mayhem without feeling guilty over representing real-life wars and battles. That may be so and is a laudible thing, but what's truly extraordinary is that Qualitieri and crew's fluff pieces can actually make you feel terribly sorry for these ridiculous little bloody-thirsty monomaniacs.

Regarding the quality of the figures, the 28mm line is excellent and on par with the best stuff Games Workshop or the Perry Twins make. It's also expen$ive at 4-6 USD a fig. The 15mm stuff is much more economical, but is sculpted by Qualtieiri himself and is not quite so breathtakingly detailed as the larger figures. However, it is very workman like and perfectly acceptable fort he wargames table.

Planning the units and basing
I plan to use my 15mm quar with Specialist Military Publishing's Future War Commander rules and also, possibly, with Rapid Fire. I've thus decided to base my figures at a scale of 20 quar to a casting. This means that a regulation sized catrawd of 9 line companies and 1 assault company will be made up of 20 stands of 2 castings each. I've decided to base light machineguns and light mortars seperately at a scale of six weapons to a stand. The average catrawd thus gets three stands of each. Technically, at the platoon/section level of play, these weapons would probably be factored in to the regular stands. However, being that this is WWI -style combat, with relatively few vehicles, I'd like to give players a wide range of infantry types to utilize during the game, so I've gone with seperate basing of company-level support weapons.

Each catrawd will also get a regimental command stand of 3 figures and a flag and 2-4 "battalion" commanders, mounted singly.

Zombie Smith makes heavy tanks for the 15mm line and I bought one. I also picked up some WWII German 150mm infantry guns from Pendraken's 10mm line. These are funky-looking castings which fit right in with quar's style. I figure that they are 75mm support guns. Finally, I did some simple conversions for the artilleryquar (basically cutting away their weapons) and assault engineers (engineers get a bit of small plastic tubing on their backs to carry their anti-obstacle and demoltion charges, while flamethrower quar have two bits of the same tubing attached to their packs as fuel tanks). I also converted some mounted officers into lancers by filing down their epaulettes and giving them plasticard carbines and paperclip lances.


Pendraken infantry guns employed by Crusaders


A column of assault engineers led by flamethrowers

My first unit will be a Crusader provisional brigade; a mish-mash of remnants of other units and, consequently, something of a combined arms force.

The 116th Provisional Brigade

The simultaneous revolts in Lower Barro and Kryst of 1772 took the Crusader High Command by surprise, though by all rights they shouldn't have. Both nations had been relatively quickly overrun before the Crusade even properly began. Lower Barro had always been one of Alykinder's main bases of political support, but the False War had resulted in the wholesale exile of the nation's royalist political class, who maintained their connections with the region's principal clans from their refuges in Fidwog and Creevin. The conquest of Kryst, while rapid, had been less than complete, with significant elements of the Krystian regular forces (most particularly the famous Sand Stalker Brigade) undefeated. Furthermore, like the nobility of Lower Barro, Kryst's most notorious royalist leaders were exiled, not killed.

By late 1770, then, both regions were passing through a marked upswing in partisan activity, which was barely kept in check by Crusader internal security troops and the local police. As overstretched as Alykinder's forces were, few regular units could be dispatched for partisan-hunting operations in the deserts and mountains of what was still generally considered to be the Crusade's backyard.

In 1772, several city states in Kryst openly entered into revolt as well as the city state of Mulf in Lower Barro. Initially, rebel forces consisted of militia levies, backed up by partisans and a handful of elite city guard catrawds (most notoriously the Sand Stalkers, in the case of Kyrst). The rebels' immediate opponents were a grab-bag of Crusader units which generally fell into one of two categories: tired and depleted veteran units which were in the region resting and refitting prior to redeployment elsewhere, or newly raised, very green reserve Catrawds.

The 116th Provisional Brigade was organized around several Crusader units which were in the southern portion of Lower Barro when the revolt began. It is an excellent example of just the sort of ad-hoc battlegroup which bore the brunt of the initial rebel assault.

The 116th Crusader Guards Catrawd
Sylwedl Yrseg, Commanding
5 Ryfler Companies, 3 Assault Companies:
41 Officers,
369 Enlisted
6 100mm Infantry Guns
4 Baeliog Armored Tractors

The core of the Brigade was made up of the remnants of the 116th Crusader Guards Catrawd under the leadership of Syrnol Cysrad, who was quickly breveted to Caernerol and brigade command at the start of the rebellion, leaving effective control of the 116th Guards to his second in command. Initially, the catrawd had only enough ryflers to make five understrength companies and only a third of its authorized support weapons (mortars and light machineguns) were available. Cysrad, however, quickly attached the faculty of the Welfyn Combet Engineer School to the unit, giving it an additional three companies of flamethrower and demolitions-equipped assault troops, two batteries of light infantry guns and four old, but serviceable, Baeliog heavy tractors.

Remnants 35th Gendarmie Squadron
Syrnol Dweezil, Commanding
1 Composite Troop
4 officers,
61 Enlisted

The 35th Gendarmie was a cavalry unit on internal security duty which had been largely overrun by Lower Barro militia in the opening days of the revolt. The squadron's remnants fell back on Welfyn where they were re-equipped and re-organized by Cysrad as the Brigade's reconaissance unit.


Sylwedl Yrseg plants the catrawd's flag behind the infantry gun battery.
To his left, two wedges from the 35th Gendarmie wait in reserve.


Three rhyfler companies from the 116th advance in skirmish formation through a small valley.
Light machineguns anchor the line's right flank and a light mortar battery has set up in reserve,
ready to offer fire support if necessary.


Two shots of the 116th's Baeliog Tractor squadron.

Future War Commander Stats for 15mm Quar


Tuesday, October 12, 2010

New Project: 15mm Quar

I bought some of Zombie Smith's excellent Quar figures for a change of pace when I went up to the States in September. These figs were recently voted "Best Sci-fi miniatures of the year" by the crowd over at The Miniatures Page and they come  in both 15mm and 28mm.

Here's some initial shots of my first batch of painted 15mm quar. The photo quality ain't great and I'm sorry to say I had to relearn how to paint 15mm after all this time painting 3mm stuff, so the paint job isn't as good as it could be. But these are just "rough" shots. I plan to do a mega Quar post in the very near future, with rules and stats for Future War Commander.

These are based presuming 1 figure = 20 quar, with two bases being a Quar company.


Above, you'll see the core of the 116th Guards Catrawd. 3 companies of Guards to the right, a Baeliog Armored Tractor in the middle with two batteries of infantry guns to the right of it and finally three companies of assault engineers on the left.


Baeliog troop. The vehicle modeled here is "Old Number 7" from the Welfyn Combat Engineer School.


Sylwedl Yrseg, and his retinué, commanding the 116th Guards Catrawd. 


The newly raised 6006th Reserve Catrawd from Tok, at full parade strength.


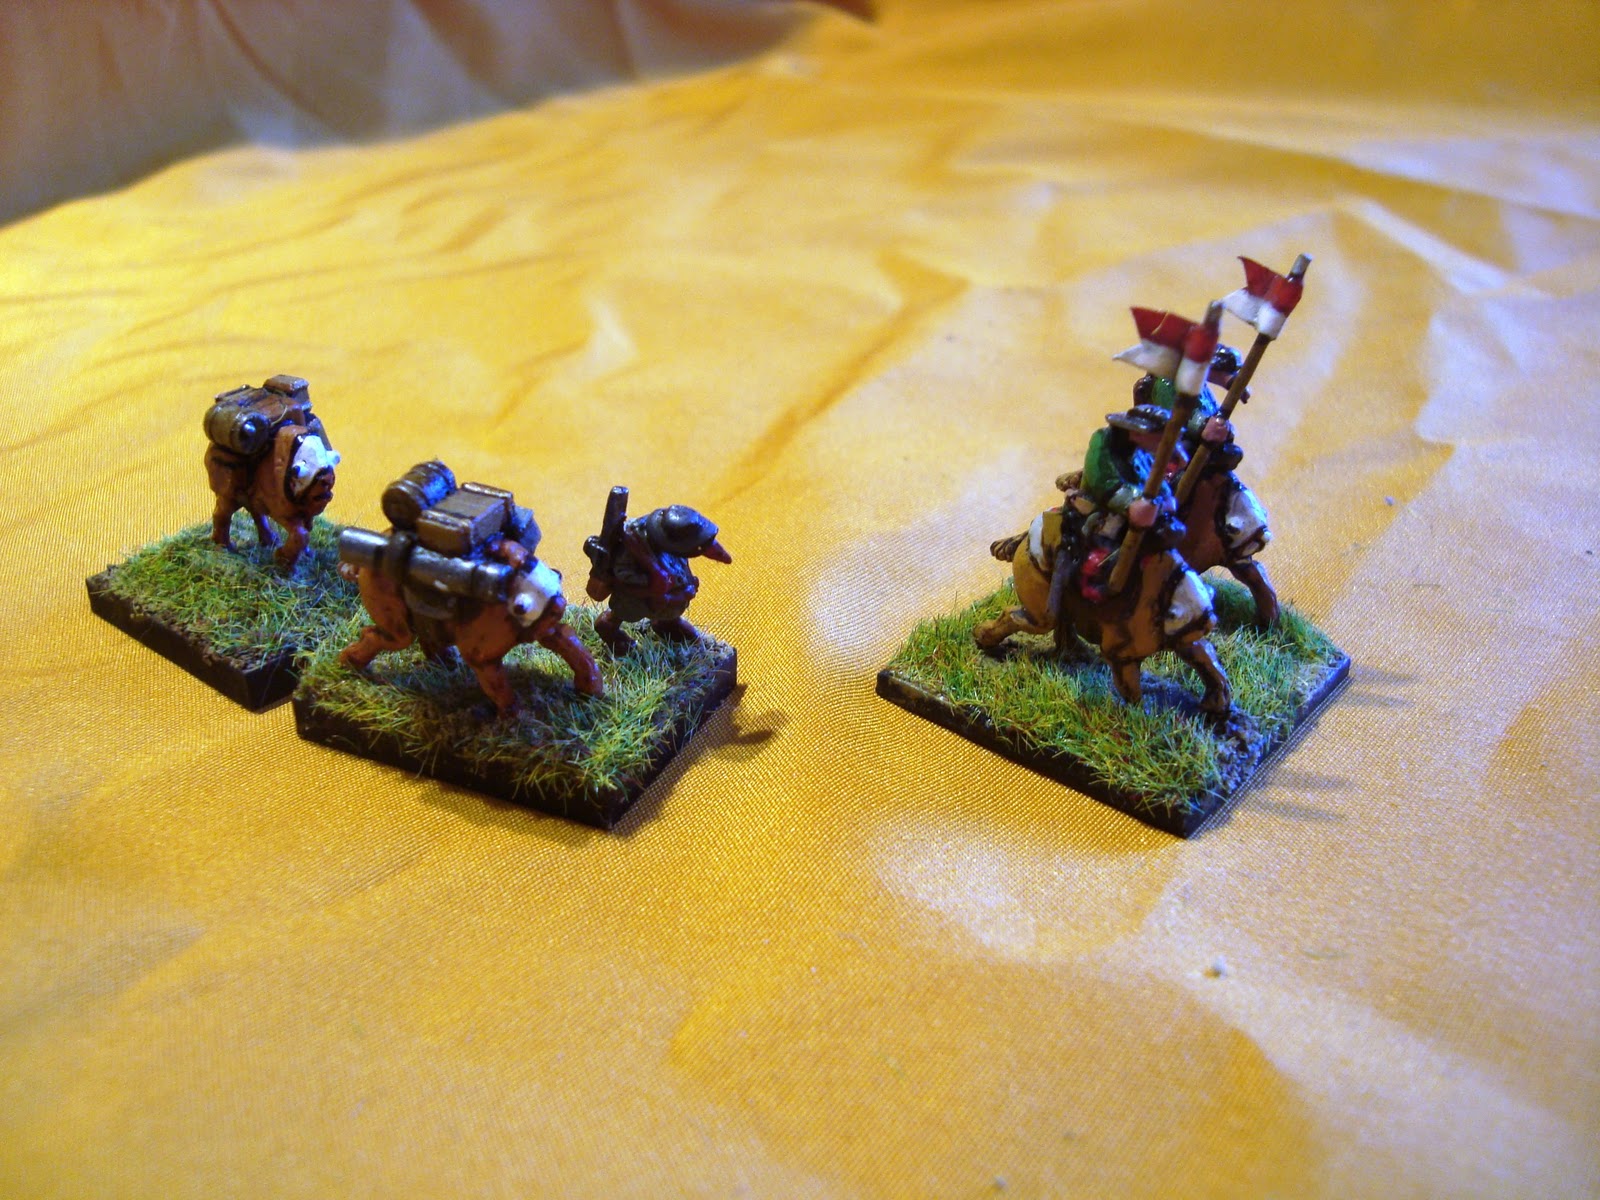
Two wedges from the 35th Gendarmie Squadron escort a baggage train.


Close up of the 35th Gendarmie.


A flying squadron of Kryst's famous Sand Stalker Brigade. Obviously, the transport has been left behind somewhere, along with the machinegun carriages.